Showing posts with label Half Square Triangles. Show all posts

Wednesday, July 21, 2010

More of the Process

I worked on the next set of blocks last night and this morning.

Instead of having four cream triangles on each corner there are three and then one of the red dot print.  I made 14 of these, they will go along with the 17 blocks that I made the other day totaling 31 blocks.

Next, I put together these red and cream half square triangles.

I sewed two together and then

A third.

It's time to trim again so I got out my template.

After trimming it looks like this.

I then started sewing triangles on the three corners,  two red and one cream.
I trimmed again so all the sides were straight.

I used my long ruler to measure 1/4 inch past the center and then cut off
 the excess fabric.
I have 16 of these to finish trimming tomorrow.  I made 18.

I will start putting it all together tomorrow.  This is what the bottom right corner will look like.

Tuesday, July 20, 2010

Today!

I started today by cutting squares that are 3 1/2 inches square from the cream broadcloth.

Then I cut each of the squares in half.

I placed the triangles over the print to be sewn like shown in the picture.

I sewed a cream colored triangle on each of the 4 Fresh Cottons print triangles.

This is now starting to look like a block.

I pressed each block in preparation for trimming.

I trimmed one side and then the opposite side so it measured 8 inches across.  Then I trimmed the last 2 sides.
Here is the finished result, a perfect 8 inch square.  I made 17 of these for the center of the quilt.

Monday, July 19, 2010

The Process So Far!

Well, here I am with 62 five inch squares of Fresh Cottons prints and 62 five inch squares of cream broadcloth.  Notice I have drawn a line diagonally across each of the cream squares.

I am now sewing one cream square to one print square, stiching 1/4 inch on each side of the drawn line. 

Next I cut on the line.

And I have two squares that look like this.

I always press to the print or the darker fabric.  This works very well for pinwheels because when you sew them together the seam allowance will fall on opposite sides.

I put four half-square triangles together for each pinwheel.  I sewed the bottom two together and then the top two then pressed the seams again and sewed the two halves together.

It will now look like this.  If you are very careful about your 1/4 inch seams and press well and pin carefully at the seams, your points should come together very well in the center of the block.

I then made a plastic template from the pattern that came with the quilt pattern.  I traced around the template with a pencil on each of the four corners.

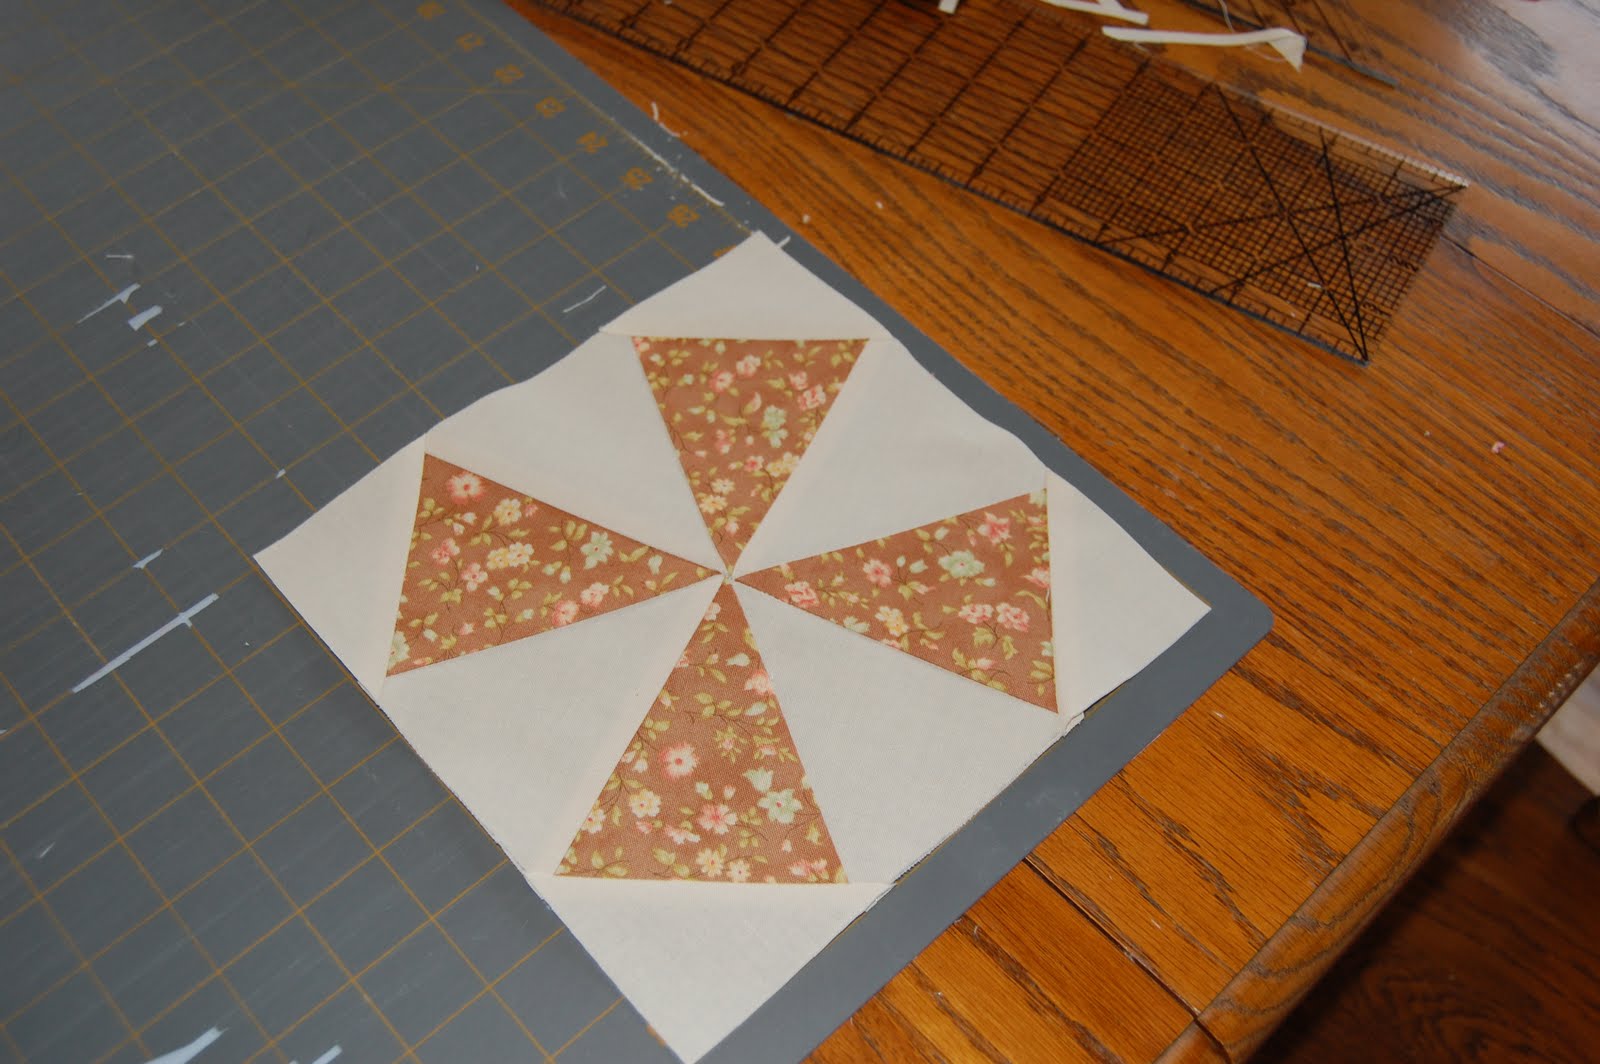
Now it is time to start trimming.  I used my triangle ruler to get a nice straight edge instead of just eyeballing the pencil line.

This is what it should look like after it is fully trimmed.

Here are a few more.  I really like the look of these octagons.
Here is the pile of pinwheel blocks ready to be trimmed.  The quilt pattern calls for 31 of them so I guess I'd better get busy.

Tuesday, March 2, 2010

Easy Triangles!

I have started my last quilt for the Castle Country Quilt Show on March 19th and 20th.
It involves a whole lot of triangles.  A few weeks ago I was trying to explain this easy way of doing triangles to my daughter over the phone.  She was not really understanding my explanation, being new to quilting.  So, here it is, nothing new to those of you who are experienced quilters, but to those who are trying triangles for the first time, this is a quick and easy way. 

You will start with squares.  Any size will do.  These just happen to be 6 and 7/8 inch squares.

Place squares with right sides together.


If you look close, or click on this image, you will see I have placed the squares of fabric with the diagonal line of my (sad) cutting mat running through the center, corner to corner.

With any straight ruler, draw a line from corner to corner.


Sew a seam 1/4 inch on both sides of the line.

Your squares will now look like this.

With scissors or a rotary cutter, cut on the line.

You will now have 2 sqaures that look like this.

You can place them in a number of combinations.  This will make a diamond shape.

This could be the start of a zig zag quilt.

You would start a pinwheel block like this.

Good luck, and happy quilting.
01 09 10